Showing posts with label Furniture. Show all posts

Monday, February 17, 2014

Living Room Chairs {Furniture Refab}

So  after I bought my vintage sofa and new rug, I was looking for some side chairs for my living room. I knew I wanted two of the same chairs to add some balance and I also wanted a mixture of old and new.


I've been seeing rattan chairs all over design blogs and magazines and something has really been drawing me to them.

One day, I spotted this one on One King's Lane. I love the open 'airy' feeling of the rattan and the comfort of the big deep cushions.  But I also love the fact that this one is a wingback, so it feels a little more like it could shine in a formal living room rather than being sent off to hide in a sunroom. Unfortunately, the $999 price tag made this one WAY out of reach, especially since I needed two.


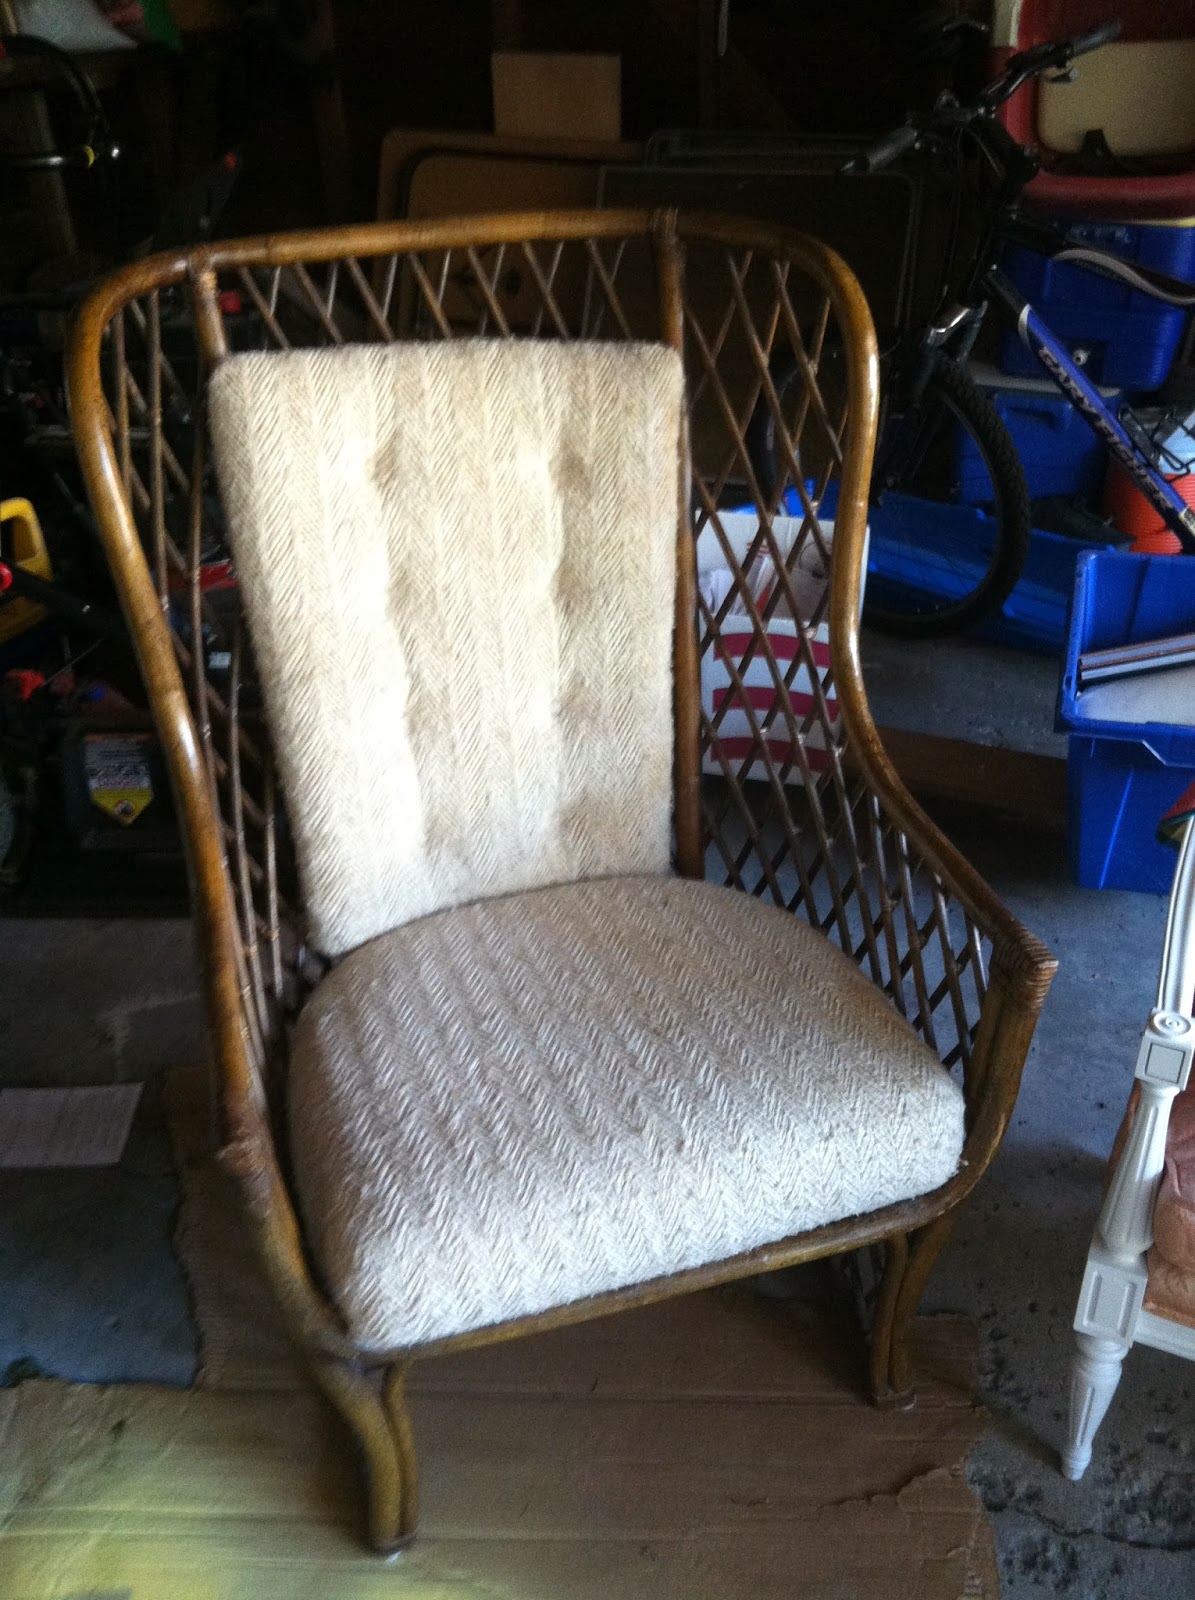
It was around that time that I spotted these two beauties fixer-uppers on craigslist and snatched them up for $80 for the pair. As you can see, they need some work, which really just amounted to a little paint and some new fabric.


I tossed out the upper cushions and removed the lower cushions from their covers and tossed them in the washing machine. I had this yellow chevron fabric that I purchased almost two years ago, not knowing exactly when and how I would use it.


This is where my mom came to the rescue...She made the cushion covers for me when I was home for Thanksgiving weekend. I had planned to do it myself, but its always faster when she does it. After all, she's the expert and the one with the awesome sewing machine. One day I will get one. Anyway, I helped. Here is the cording that we covered with the fabric.


And here is a completed cushion.


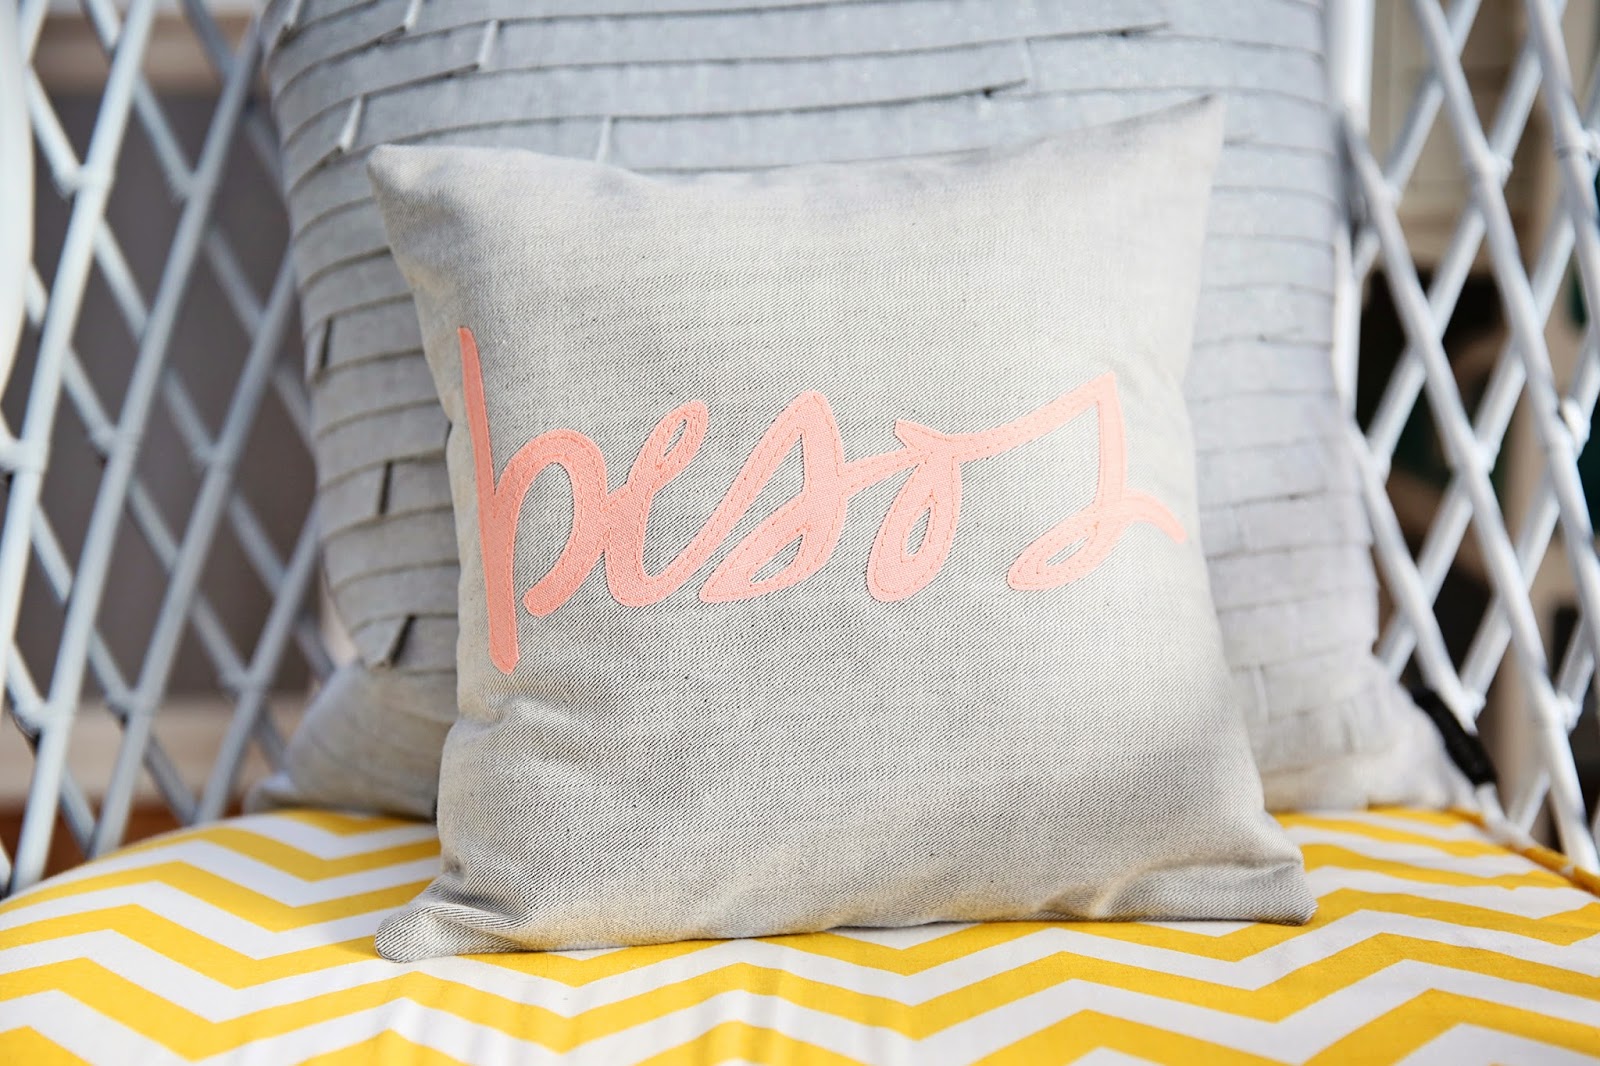
I added large grey down pillows that I found at TJMaxx for the back of the chairs and also these adorable, decorative handmade pillows, purchased on etsy from Caitlin of Bright July. I love, love, LOVE these pillows. We got one that says carpe diem and one that says besos. Both sayings have meaning for me, but besos has extra special meaning in our family. Yes, I am a Spanish teacher, so there is significance there...but also...all three of my children had besos as one of their first words. We always use the word besos instead of kisses, every night before bed. In fact, right now, I am certain Cecilia knows what besos are but not so sure if she knows what kisses are.  I love filling my home with things like this that have meaning for us, and also supporting artists on etsy in the process. If you don't know etsy, than you are living under a rock and you must drop everything and go check it out. NOW. 


So here you can see how my two completed craigslist beauties add some light and airy punch to my living room. I actually think they rival the One Kings Lane high-end version. In fact, I think I like mine better. And at less than 5% of the price, they are a home run for this 'almost there' living room. 


More to come...Stay tuned for a coffee table and some ottomans.


Sunday, April 14, 2013

Vintage Blue Velvet Sofa | A Fabulous Find


I am in LOVE. With this little ballerina and this vintage sofa. Stay tuned for some living room progress, coming soon.


Thursday, November 29, 2012

Refinishing and Re-upholstering a Chair {DIY Chair Project}

Here are a couple chairs that I found for SUPER cheap. The first was a set of six that I found at an estate sale through craigslist. I got all 6 for $25! The one pictured was in the worst shape.
This one I found at a consignment store for $20. I thought after I spiffed it up it could be a really cute prop when I'm taking children's portraits. I really like the turquoise velvet and it was in really good shape so all this one needed was a little paint.
I wish I would have taken more pictures of the entire process so you could see the "how to" but these will have to do. The painting is really a no-brainer. I used to paint furniture with brushes and oil paint. WHAT was I thinking? That was so tedious and really so unnecessary. Ever since I've discovered the magic of spray painting furniture, I've been addicted to furniture makeovers!! I have experimented with many different brands of spray paint but I have found Rustoleum Painters Touch to be by far the best. It comes in many shades and sheens and has the most ergonomically-finger-friendly (yes, I made that up!) sprayer.

Spray painting makes things quicker and easier, but its not the greenest of options, so I always make sure to paint over everything I spray with this eco-friendly lacquer. Three thin coats. I learned that trick from my idols over on the YHL blog. Love this stuff.


So, there she is after a couple coats of spray, then some hand-sanding on the edges to give it that antiquey, weathered look and a couple layers of safecoat acrylaq.  Of course, I carefully covered all the fabric on the chair during the painting process with tape and paper and when I removed it all, she looked as good as new. Much more modern looking, don't you think?

As for the dining chairs, most of the seats were in pretty good shape, so I simply removed all the seats by unscrewing them from underneath, and recovered them with new fabric from here, pulling it taut around the edges and using a staple gun to staple it onto the back.  For the ones that needed some extra love, I bought some foam at JoAnn Fabrics (I had a coupon!) and cut it in the shape of the chair. Then I realized I needed some batting on top of the foam to give it that extra-cushiony feel and the rounded edge shape so back to JoAnn's I went. I also had to make sure to pull the fabric really really taut around the edges as I stapled around the back otherwise the cushion felt too loose and the edges looked to squared off.


Now, you could stop there if you wanted to, and simply put the seats back on the freshly painted chairs... It would look fine. But I much prefer the completely tailored look with the rolled edge around the seat....So I used the cord from the old seats and cut strips of my new fabric. Since I don't have a sewing machine, my mom sewed the new fabric over the cording for me.


When the cording was ready, I stapled it around the edge of the bottom of the seats and voila.

This baby came a LONG way, don't you think?


And here she is with her three sisters sitting around my dining room table. I am pleased with the result. What do you think?


Oh...and the little velvet gal made her way into the corner of my living room for now. I'm actually envisioning an upholstered parsons chair in that spot sometime down the road....And in case you were wondering. I got that desk at a garage sale down the street from my house for $20. It was my birthday and I had taken the day off work to go to some doctor's appointments for myself and my kids. Not the best way to spend your birthday. Anyway, I was on my way to appointment numero uno when I drove past the garage sale and spotted this desk. It was calling my name. Hopped out and asked how much. $20??? Happy Birthday to me!! Of course it didn't look exactly like this. I painted it and added glass knobs, but it was seriously love at first sight. 


That darling pewter camera was a Christmas gift from my brother-in-law! Isn't it sweet? Thanks, Jeff! Its from Z Gallerie. The lamp was a great find at TJ Maxx and the painting is an original by yours truly. I know, I know, its pretty amateur. I don't claim to be a painter. Its sort of a "place-holder" of sorts until I find something better to go there. I made this masterpiece during a friend's bachelorette party at one of those cool wine and painting places in Chicago. Bottle and Botega. So fun. Wine and art. What could be better? I got the frame at a consignment shop near my house. Actually, I bought a framed painting for $10, but I bought it for the frame. It was dark wood so I just spray painted it with several coats of high gloss black.  What have you painted lately? Do you prefer spray or brushing on paint? Do you drink wine when you paint? Wine makes everything more fun, don't ya think?

Friday, December 30, 2011

Ch-ch-changes {Painting an Old Buffet from Craiglist}

So I found this old buffet on Criagslist for $125 but I talked the guy down to $75 because as you can see it was in pretty rough shape. He actually included delivery to my house in the price, but the timing didn't work out right and he delivered it when I wasn't home. It sat outside in the rain for an hour or so and the side of the buffet warped from all the water. So I mailed the guy my check but asked if he would consider giving me $25 back given that I bought it sight unseen all because he didn't arrive when he said he would. So he did. Mailed me a check right back for $25! Bam. An awesome antique buffet for $50.


Not that I didn't have to put quite a bit of TLC into it, but it didn't actually take the long to get it looking like this:


I HEART her. Did I mention I used Rustoleum Painter's Touch Satin Summer Squash spray paint? Then I of course painted over that with my faovrite eco-friendly lacquer, Safecoat Acrylacq to seal in the toxic spray paint fumes. I LOVE the turquoise on the inside of the cabinets and the sides of the drawers. Its such a fun surprise when you open her up to peek inside.


And I also lined the drawers with pretty paper. When I have time I am going to decoupage it in permanently and of course paint over that with my favorite, Safecoat Acrylaq.


Oh and remember the old dresser that I refabbed that used to live right here in my dining room. Well, she found a new home in my bedroom. She's a perfect fit:

Monday, October 31, 2011

Painting a Wood Dresser or Buffet {Furniture Refab}

So I got this beauty for $25 at an estate sale that I found on Craigslist! The day I purchased this was probably my most successful thrifting experience of all time. For $110 I got 6 dining chairs, two beautiful mirrors and two long, solid dressers. I bought this one for $25 and the guy was so eager to rid himself of the other one that he threw in the second identical one for $15! I gave it to a friend, but am actually kicking myself for not keeping it. You can see from this before photo that it was old, ugly and outdated. Nothing a little paint and some new (or even "refreshed") hardware can't fix....


This piece was actually in such great shape (no dings or scratches at all!) that I didn't even have to sand it down before priming. First I removed all the hardware and hinges and then I used Rustoleum's Painters Touch White Primer to prime the whole thing, inside and out.

Next I painted the sides of the drawers and insides of the cabinet doors and the faces of the cabinet drawers with Rustoleum Summer Squash yellow, giving the insides a sunny feel and a nice surprise when opened. It took about 3 coats of spray to get the right amount of coverage. Next I used Rustoleaum's High Performance Gloss White all over the outside of the dresser, again with about 3-4 coats of coverage. However, if I had it to do all over again, I would have used Rustoleum's Painter's Touch Gloss White, mostly because the spray tip is more ergonomically comfortable on the finger to use. Next, to seal the deal (and the nasty spray paint fumes) , the entire dresser, inside and out, got a coat of my favorite eco-friendly lacquer: Safecoat Acrylaq.

To refresh the old, brassy hardware, I sprayed my favorite Oil-Rubbed Bronze, (ORB) which I had left over from my Family Room built-in project.


Next for the bottoms of the drawers, I used scrapbook paper in shades and patterns of white, cream, beige and yellow and decoupaged the bottom of each drawer with a decoupage paste that I picked up from Michaels. Each drawer was customized with its own unique pattern-- So fun and my favorite part of the final product. I followed that up with a coat of Safecoat Acqrylaq and Voila:


For now, this piece has found a home in my dining room as a buffet, but I just picked up another piece (found on Craiglist or course!) that I will refab for use as a buffet and this beauty will take up residence in my bedroom and rediscover its identity as a dresser.